Wednesday, 4 November 2015

Creating an Autumnal Design - FREE TUTORIAL


Hello my lovelies...
Following on from my last blog post, as promised, here is my tutorial on how to use Mother Nature's inspiration to help you with designing a project....

The number one question I am always asked is "As a textile artist, how do you know where to start when designing?"
the answer is simple... I don't!
I'm a firm believer in letting a design evolve in an organic way and apply this philosophy
to all my designing but I know that many crafters find this concept quite hard to follow.

If you love stitching, by hand or machine, you will want to experiment with colour, texture and of course think of your own designs.
Once you have gained confidence in your actual stitching from using a pattern you will want to move on and start designing your own projects.

I've previously written a tutorial on how to gain inspiration from Mother Nature to help you get started which you can read here

Today I am showing you how to use those ideas in the next stage of your designing...
Using elements from Mother Nature...

I hope you will gain some ideas from the following tutorial....

Creating an Autumnal Design

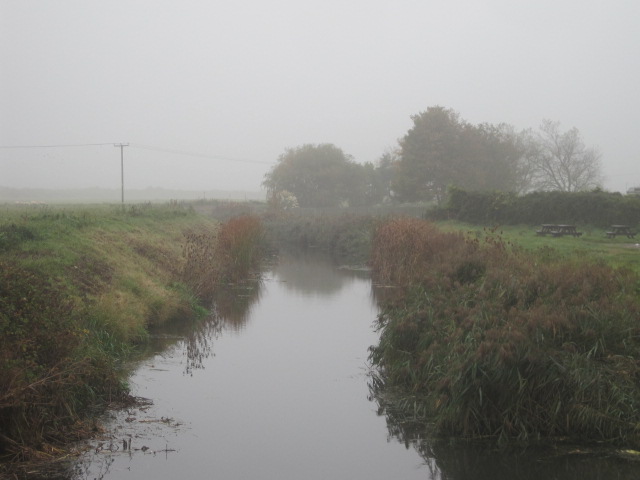
Last week I collected these leaves on an early morning walk not knowing quite 
what I wanted to do with them.
I simply loved the colours, the smells, the shapes and the textures!
I wanted to capture their beauty for future projects.

So, how to get started transforming them into a design?


Start by photographing each leaf in turn to show more detail and finer points to include in your design.

 Take time to look carefully at the colours, the shades and how the pattern emerges together


The next step is to capture your leaves actually onto paper for future reference.
You do not need to be an artist to do this....

Using a normal HB pencil and piece of plain white paper, simply trace a fine line around each leaf in turn to help you become familiar with the shape of each leaf.


Please do not worry about being exact because you can add a little more detail once you start shading.
You may want to only use the outline of your leaf for a particular design rather than a full leaf so try experimenting with ideas.

I like to use Derwent Artist's drawing pencils but you can use any medium you prefer.
You may prefer to use felt -tips (for a firmer outline), charcoal or even watercolour pencils
that you can later add more detail to.

The process is simply to take things back to basics and look at the shape of the leaf
and how the shading alters the actual look of the leaf.

Allow yourself permission to take time and focus on the leaf itself.....


These doodles will form the foundation of your designs however you decided to use them.
You can keep them as a visual reference and if you combine them with your original photos
you will have a choice of designs.

I chose a few of my leaves to combine to compare shapes and designs....
Here are a few questions that may help you decide what to look for when doodling...

Do you want to capture the glossiness of the surface?

Have you looked carefully at the leaf veins?

How many colours will you need to use?


Don't forget you DON'T have to use the exact colouring...
It is your interpretation.
You are simply using this as part of deciding how you would use your leaves in your design.
There are no right or wrong ways!

Even if you have no idea of how your leaves will be used in a design as yet you will have your doodles in your reference library that you can use time and time again....

You may want to use them for 
- hand embroidery
- free motion embroidery
- machine embroidery
-applique
- mixed media collage
- card making

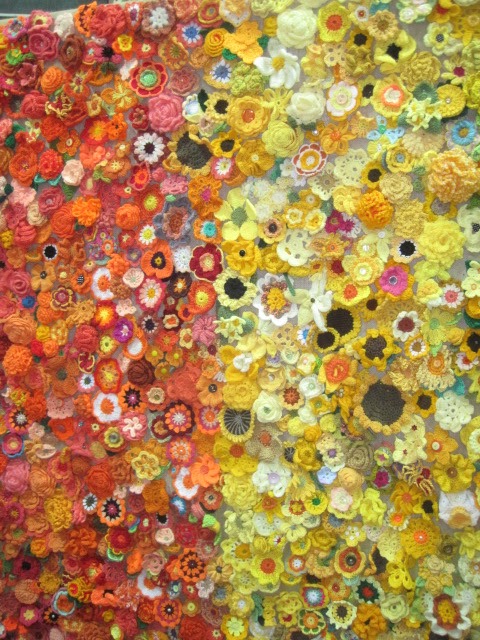
I have used my designs on a piece of calico with some free motion embroidery
which I may make into a bigger piece of textile art


You can see that I have used the actual size of the leaves but you can of course reduce or 
increase your sizes to suit your project.

I often draw with my enbroidery threads creating shading as I work but you may want to work on top of your designs if you have maybe painted them onto fabric.
Of course, you will need to make sure you use washable markers if you intend to launder your actual project.


If you would like some more inspiration for Autumnal projects you can check out my Pinterest board


I hope these few simple rules will help
when starting to design...

I would love to see some of your lovely projects...

Happy stitching...

Tilly
x x x

Sunday, 1 November 2015

Autumnal Inspiration....


Hello my lovelies!
November already.....
Wowie.
Just exactly where has this year disappeared to?
(answers on a postcard pleased to Tilly @confusedoldlady.com)


It really doesn't seem possible that we are turning our thoughts towards that
time of year....
dare I actually say the  'C' word out loud?


As many of you know I'm really not a lover of the torrent heat of summer but neither am I a fan of the bitterly cold Winter.
 I much prefer the gorgeous seasons of Spring & Autumn...
the seasons when you can wander out in just a thick wooly, some boots and a warm scarf to keep your neck all snuggled.


How about you?
I absolutely adore walking in the Autumn mists and smelling the change of season in the air...
Last week I managed a beautiful walk early in the morning when most people were asleep.
Greeted with early morning mists, dewy cobwebs and damp carpets of muddy grass I ventured out with my little camera for company.
At times like this, I do wish I had a lovely dog to have as a faithful friend to accompany me on my wanderings but hey, you can't have everything in life I guess...


My mission?
Simply to take in the sights, smells and sounds of Autumn early in the morning.
I've always been a fan of early morning since a teenager, when I had a paper round.
There was always something quite magical about the quietness of the day.
My thoughts have never altered and I still love to walk early in the morning when I can.

Mother Nature didn't disappoint and I managed to snap loads of beauties...


I do wish I had a better camera to get the really fine details and sharper colours.
(It's on my Christmas list!)

I love to save my shots for inspiration when designing especially when doing some free motion embroidery.
I always go home feeling very inspired from the sights I capture however big or small and then love taking some time out to doodle away in my journal a little, like a modern version of the Edwardian lady - Edith Holden.
I wonder if she would've enjoyed my sketches and embroideries?


As I wandered home with my collection of wet leaves I had collected along the way I decided I wanted to do a little tutorial for you all to help get started when taking inspiration from Mother Nature as many of you lovelies have said you sometimes struggle with knowing how to start etc.
Watch out for my next blog post with all the details...


In the meantime I'm off for a cuppa or two...
Will you join me?


Toodle-ooh til the next my lovelies!

Tilly
x x x

Thursday, 29 October 2015

Tilly's Remembrance Poppy Corsage - FREE PATTERN


Hello my lovelies!
how are you all?

It's that time of year again when we all start to turn our thoughts to those brave souls who gave so much for our country in a variety of ways....

Today I am giving you the chance to crochet your own Poppy corsage to wear with pride and show your support for the many men and women who did so much...

I am very proud to say that this is my first pattern that I have designed and written and am so pleased to be able to offer it in support of such a good cause.

The pattern is suitable for all abilities.
If you are unsure of any of the stitches there are loads of videos on Youtube that you can view to help you .
I am hoping to be able to offer my own tutorials soon so watch out for those to!

Tilly’s 'Remembrance' Poppy Corasge


Requirements – oddments of black (A) & red (B) chunky yarn,
                         5.5 mm hook
                         black button
                          brooch pin

Abbreviations
Ch – chain
Dc – double crochet
Tr – treble
Dtr – double treble
Ss – slip stitch

Foundation Row
Using A, ch 5.
Join with a ss to form a ring

Row 1
Ch 2 (counts as first dc), 11 dc into ring
Join with a ss to top of second chain to join circle
Fasten off A. Join B

Row 2
Work into first dc space - Ch 1 (counts as first dc), 1tr, 1dtr
Work into second dc space – 5 dtr
Work into third dc space – 5 dtr
Work into fourth dc space – 1dtr, 1tr, 1dc
Repeat this sequence twice in the remaining 8 dc to create the last two petals.
Fasten off.
Sew in any ends of yarn and add your button.
Sew a brooch pin on the reverse of your poppy to attach your corsage.

I hope you enjoy making my little poppy corsage as much as I have designing it.
My only request is to please pop a small donation into the collecting tins of the poppy sellers that we see on our high streets to support our servicemen and women. It is such a valuable cause.

If you would rather donate online and support The Royal British Legion, you can do so here by simply clicking on the link

I would love to hear from any of you who use the pattern and maybe send in any pics of your poppies so I can share with everyone on my FB page https://www.facebook.com/tillysvintageworkshop/


We owe so much to so few...
Please do show your support by wearing your poppy with pride

Many thanks

Tilly
x x x


Monday, 5 October 2015

Yarndale - A Beautiful Rainbow of Colour....


Hello lovelies!

I hope you all enjoyed my first post on Yarndale...
I was absolutely over the moon to receive a lovely comment from Lucy Attic 24, one of the organisers!!!

As promised here is another glimpse at the riot of colour therapy on offer last weekend in Skipton.

Flowers for Memories...
Viewers were invited to send in crocheted or knitted flowers of all colours, shapes and sizes to be transformed into a beautiful rainbow wall of colour by the organisers of Yarndale in support of supporting a charity very close to my heart.
The idea originated from artist Sheila Metcalfe to raise awareness and funds for The Alzheimer's Society.
You can find out more details about the project HERE on Yarndale's website.

Like so many other people, I was absolutely stunned at the amazing piece of art that was put together using all of these beautiful blooms....
I say art because in my mind that is exactly what it was..
..not just a board of yarn flowers but a work of art lovingly sourced, designed and made, assembled and displayed by people who feel passionate enough to help in a very tiny way to support this dreadful illness.

Anyone wishing to have their photos taken against the gorgeous backdrop during the weekend were asked for a small donation to help with the funds and at the end of the event Sheila had raised an amazing £1811.80 for the charity.

Well done Yarndalers for supporting Sheila in her quest...amazing!
I absoltely adore the fact that from one small idea one HUGE project evolved...
From small little acorns as they say...or in this case from small little blooms...


Of course I had to have my piccie taken to!

My little camera really doesn't do this wonderful display justice...
the textures, different yarns, different patterns and styles...
I just wanted to jump right in as did so many others!

I will bring you more pics in my next post but for now my lovelies I will leave you with this little gem...
I came across this video from a fellow Yarndale visitor and thought you lovelies may like to have a little nosey if you weren't able to visit....
It has given me an idea to pop all of my 200+ pics into my own video for you all to view
so watch this space folks...

in the meantime enjoy this little glimpse of beautiful yarn therapy..


Tilly
x x x